Web Scraping Medium Articles with Scrapy: From Simple to Advanced (part III)
Add custom functionalities to a web scraper for scalable projects using Scrapy.

Introduction
In Part I, a VERY simple but ethical and efficient web scraper was built to extract data from Medium’s article collections using Scrapy. In Part II we organized the code using different concepts such as Item and Item Loaders and made the web scraper more robust.
Now, in Part III we will add some custom functionalities, including the capability of our spider to store the scraped data in a database.
If the first step of a web scraping project usually involves planning which data to scrape and how to do it, as the project gets more mature or complex, more questions arises: what to do with the data and how to maintain the dataset.
Since Scrapy offers strong extensibility support, it can help us answer these questions by allowing us to add customized functionalities to our spiders. One way to achieve this if by using Item Pipelines, and it's exactly what will be done in this article!
Objectives
The main objective is to illustrate how Item Pipelines can be used to extend and customize our spider. To achieve this, we will:
- Define what is an Item Pipeline
- Add a pipeline to define the data's default values
- Add a pipeline to save data in a CSV file
- Add a pipeline to save data in a SQLite local database using SQLAlchemy
- Add a pipeline to drop duplicated items before adding to the database
Disclaimer:
Other have already published work that inspired me to use Scrapy and how to connect it with SQLAlchemy. This article is partly inspired by Harry Wang's article "A Minimalist End-to-End Scrapy Tutorial (Part III)". If you're interested in web scraping or Scrapy, really recommend reading his series of articles about the topic.
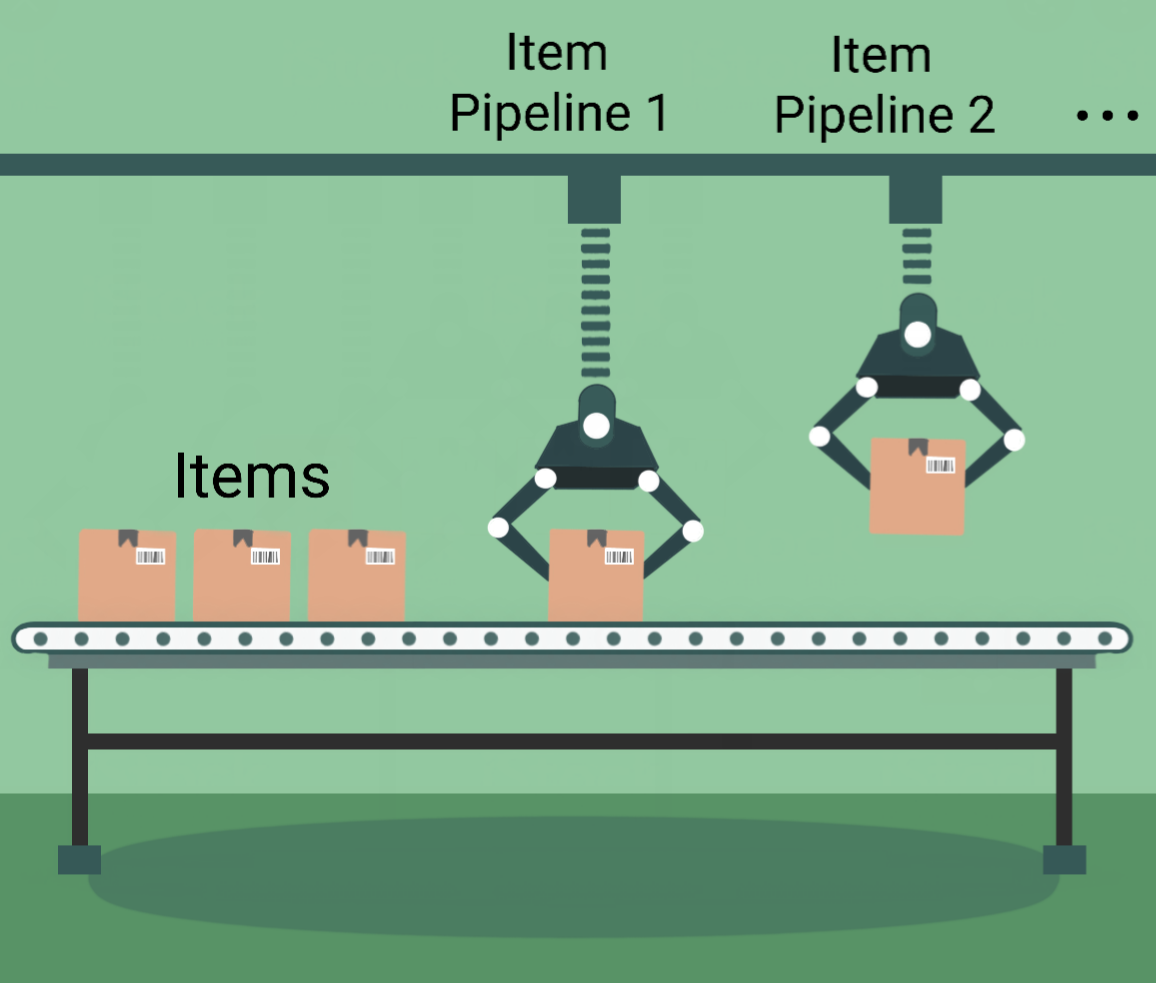
Item Pipeline
After an Item has been populated with the scraped data by a spider, it can be sent to an Item Pipeline for further processing. Each Item Pipeline component is a Python class that performs an operation on the scraped data. Several Item Pipeline components can be used sequentially.
If Items provide the container of scraped data and Item Loaders provide the mechanism for populating that container, then, Item Pipelines deals with what to do with this container.
Note that, an Item Loader, with its input and output processors, processes individual fields, that is, single parts of the scraped data one at a time. The Item Pipeline can process the entire item. Also, Item Pipelines don't need to be restricted to crude data processing. They simply receive an item and perform an action over it. This enables decision making to be done here. The class declaration, as seen below, is quite simple
from itemadapter import ItemAdapter

class YourPipeline:
    def process_item(self, item, spider):
    return item
But the use of an Item Pipeline can be greatly augmented with several methods. The methods that can be implemented in the pipeline component is shown below:
- process_item - This method is called for every item pipeline component, and basically receives and processes an item. It must return an item object, return a Deferred or raise a DropItem exception. If the item is dropped, it will no longer be processed by further pipeline components.
- open_spider - This method is called when the spider is opened.
- close_spider - This method is called when the spider is closed.
- from_crawler - This class method is called to create a pipeline instance from a Crawler, enabling us to greatly add and extend the spider’s functionalities.
Why use an Item Pipeline?
There are plenty of reasons. Item pipelines are usually used to:
- Cleansing HTML data
- Validating scraped data (checking that the items contain certain fields)
- Imputing and defining default values, in case that an item contains empty fields.
- Checking for duplicates and dropping them
- Storing the scraped item in a database such as Mysql, PostgreSQL, MongoDB, etc.
- Deciding where to save the data based on its content
- Many more
Although we have been able to save data in a CSV format since Part I with a very simple spider from the command line, this was only possible because the scrapy runspider <spider_file.py> -o FILE command uses a Feed Export behind the scenes. A Feed Export is an out of the box functionality designed for exporting data.
Although quite useful and powerful, sometimes you might need to customize how you store data or what you do with it. In fact, in Item Pipeline documentation itself there are examples of pipelines for validating data and storing data in MongoDB. And this is where Item Pipelines can shine.
Scraping time!
Two different spiders will be presented, with their name and description given below:
- Spider with CSV Pipeline (spider_csvpipe): two pipelines will be created, one for setting default values for missing data and another to save the scraped data as CSV.
- Spider with SQLite Pipeline (spider_sqlitepipe): another two pipelines will be created, one to detect and drop duplicate data and another to save the scraped data to a SQLite database.
Spider with CSV Pipeline
Here, I’ll integrate the CSV data saving functionality inside the spider. This means that the behavior of our spider will be extended, which is after all one of the purposes of the Item Pipelines.
Creating a Default Value Pipeline
Since the Item Pipeline can process items as a whole, we can create a pipeline to set a default value
class DefaultValuesPipeline(object):
    def process_item(self, item, spider):
        item.setdefault('author', None)
        item.setdefault('title', None)
        item.setdefault('subtitle_preview', None)
        item.setdefault('collection', None)
        item.setdefault('read_time', None)
        item.setdefault('claps', None)
        item.setdefault('responses', None)
        item.setdefault('published_date', None)
        item.setdefault('article_url', None)
        item.setdefault('scraped_date', None)

        return item
In this approach, we can define a default value for each value individually. This way I can set, if I want to, a number such as 0 for numeric variables and a string placeholder or None for string variables. But we could also simply iterate over the item.fields and set a default value as defined below:
for field in item.fields:
    item.setdefault(field, None)
Creating a CSV Pipeline
Scrapy already comes with Item Exporters (link) to quickly save data into files. In fact, we already have used it, since it is used by Scrapy in the background when we scrape data from a website using the command line such as was done with Simple Spider and Item Spider!
If we want to customize the Exporter though, we can instantiate it and add code for custom functionalities in an Item Pipeline.
The code for an Item Pipeline that uses an Item Exporter to save data in CSV format is shown below:
from scrapy.exporters import CsvItemExporter

class CsvWriterPipeline(object):
    @classmethod
    def from_crawler(cls, crawler):
        pipeline = cls()
        crawler.signals.connect(pipeline.spider_opened, signals.spider_opened)
        crawler.signals.connect(pipeline.spider_closed, signals.spider_closed)
        return pipeline

    def spider_opened(self, spider):
        self.file = open('./medium_scraper/scraped_data/data.csv', 'w+b')
        self.exporter = CsvItemExporter(self.file)
        # The line below is optional, but makes sure that the data is saved in a customized order
        self.exporter.fields_to_export = ['author', 'title', 'subtitle_preview', 'collection', 'read_time', 'claps', 'responses', 'published_date', 'article_url', 'scraped_date']
        self.exporter.start_exporting()

    def spider_closed(self, spider):
        self.exporter.finish_exporting()
        self.file.close()

    def process_item(self, item, spider):
        self.exporter.export_item(item)
        return item
After instantiating the Item Exporter, we need to call the method start_exporting in order to signal the start of the data exporting process, as shown in the spider_opened method.
Then, we need to call the export_item method from the exporter each time we want to export data. This is used inside the process_item method.
Finally, we call the finish_exporting method to signal the end of the data exporting process.
Updating the spider script
Before running the spider, we need to configure the spider to use the Item Pipelines that we created.
class ArticleSpider(Spider):
    name = "spider_csvpipe"
    start_urls = ['https://medium.com/hackernoon/archive']
    custom_settings = {
        # other custom settings omitted for brevity
        'ITEM_PIPELINES': {
            'medium_scraper.pipelines.DefaultValuesPipeline': 100,
            'medium_scraper.pipelines.CsvWriterPipeline': 200,
            },
        }
The number (ranging from 0 to 1000) after each pipeline addition corresponds to it’s priority, where smaller numbers have higher priorities. This means that 100 (DefaultValuesPipeline) is executed before 200 (CsvWriterPipeline).
Running the Spider
Now that we configured the spider to use an Item Pipeline that uses an Item Exporter, we don’t need to specify the data format in the command line that initiates the web scraping. That’s because, while the spider crawls through different web pages and scrapes data, every item will be sent to the CsvWriterPipeline and saved to a CSV file.
So, the command I’ll use to start the spider is the crawl command, along with the name of the spider.
scrapy crawl spider_csvpipe
Spider with SQLite Pipeline
Now, we can take full advantage of Scrapy’s features, especially the Item Pipeline in order to build a spider that can decide whether the data should be saved in a database or discarded. For this, I’ll use SQLAlchemy to save data to a SQLite database.
SQLAlchemy is an object-relational mapper (ORM) package to query and manipulate data from the database using the object-oriented paradigm. Since SQLite is a local database, its file can be saved and accessed directly in the project folder.
You can install the SQLAlchemy package by issuing the command line below:
pip install sqlalchemy
Creating the database model
Before we go into the Item Pipelines related to this spider version, we need to define the database schema, which is the organization and structure of a database. There are many ways to design a database schema, depending on the data and on the design objectives. Here, for simplicity’s sake, I’ll create a single table to hold all the scraped data.
I won’t cover the details of ORM and database schemas since it is out of scope of this article, but in the Resources section there are some links you can access for further reference.
First, we’ll add the database location to the settings script:
CONNECTION_STRING = 'sqlite:///scraped_data/medium.db'
To define the database schema using SQLAlchemy, I’ll need to create a models script in the project directory with the following content:
from sqlalchemy import create_engine, Column
from sqlalchemy.ext.declarative import declarative_base
from sqlalchemy import Integer, String, DateTime
from scrapy.utils.project import get_project_settings

Base = declarative_base()

def db_connect():
    # Connect the database using the settings from settings.py.
    # Returns a sqlaclchemy engine instance.
    url = get_project_settings().get("CONNECTION_STRING")
    return create_engine(url)

def create_table(engine):
    Base.metadata.create_all(engine, checkfirst=True)

class MediumDbModel(Base):
    __tablename__ = "medium"

    id = Column(Integer, primary_key=True)
    author = Column(String(50))
    title = Column(String(100))
    subtitle_preview = Column(String(200))
    collection = Column(String(50))
    read_time = Column(Integer)
    claps = Column(Integer)
    responses = Column(Integer)
    published_date = Column(DateTime)
    article_url = Column(String(200))
    scraped_date = Column(DateTime)
The db_connect() function first gets the location of the SQLite database file, which is specified on the settings file and uses it in the create_engine() to connect to the database. The MediumDBModel class defines the database schema, since we’re using a single table. In it, all the data fields and their types are described, as well as the primary key.
Creating a SQLite Pipeline
With the database scheme already defined, the Item Pipeline that saves the items in the database can be coded:
from models import MediumDbModel, create_table, db_connect
from sqlalchemy.orm import sessionmaker

class SQLiteWriterPipeline(object):
    def __init__(self):
        """
        Initializes database connection and sessionmaker
        Creates tables
        """
        engine = db_connect()
        create_table(engine)
        self.factory = sessionmaker(bind=engine)

    def process_item(self, item, spider):
        """
        This method is called for every item pipeline component
        """
        session = self.factory()
        catalog = MediumDbModel()
        catalog.author = item["author"]
        catalog.title = item["title"]
        catalog.subtitle_preview = item["subtitle_preview"]
        catalog.collection = item["collection"]
        catalog.read_time = item["read_time"]
        catalog.claps = item["claps"]
        catalog.responses = item["responses"]
        catalog.published_date = item['published_date']
        catalog.article_url = item["article_url"]
        catalog.scraped_date = item['scraped_date']

        try:
            print('Entry added')
            session.add(catalog)
            session.commit()
        except:
            print('rollback')
            session.rollback()
            raise
        finally:
            session.close()

        return item
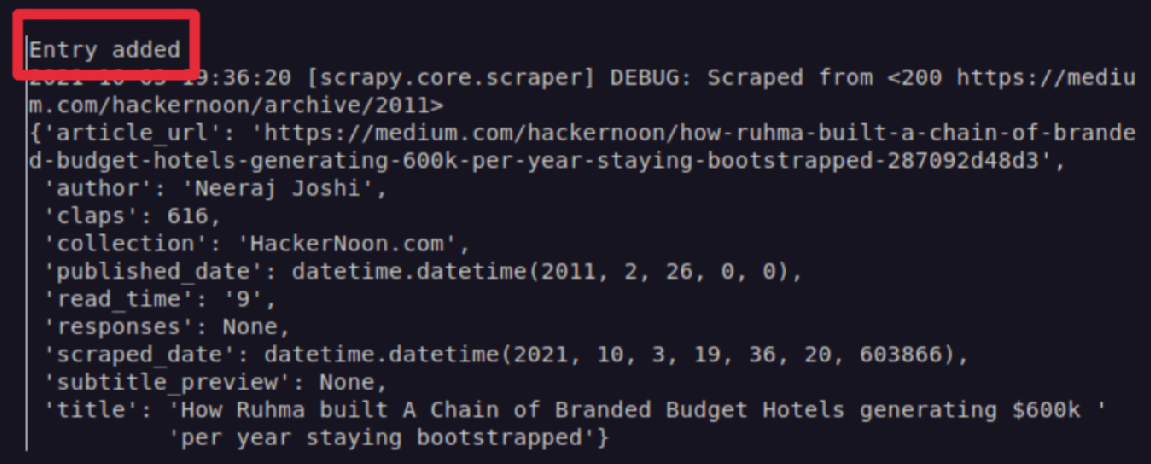
In the init method, the database and table are created, if they aren't already. In the process_item method, the instance for the database session is created. Then, a relational data model is created and all the scraped data is added to it. Finally, it is incorporated into the database.
Inside the process_item method, there’s a print with “Entry added” in the case that an item is added to the database. In fact, during scraping, this is executes and shown in the command line, as shown below:
However, if you run the spider multiple times, it will save the same scraped data multiple times, which is troublesome if you want to run the spider multiple times in order to update the database. This can be seen in the image below:

Creating a Pipeline for Duplicated Data
Let’s create another pipeline to check if the database already contains the item. If it does, the item will be dropped from the pipeline before it is saved in the database. The pipeline code is defined below:
from scrapy.exceptions import DropItem

class AvoidDuplicatesPipeline(object):
    def __init__(self):
        """
        Initializes database connection and sessionmaker
        Creates tables
        """
        engine = db_connect()
        create_table(engine)
        self.factory = sessionmaker(bind=engine)

    def process_item(self, item, spider):
        session = self.factory()
        exist_title = session.query(MediumDbModel).filter_by(title=item["title"]).first()
        if (exist_title is not None):
            raise DropItem("Duplicate item found: {}".format(item["title"]))
        else:
            return item
Since this pipeline will be executed before SQLiteWriterPipeline, in the init function we create the database and table, in case it isn’t already created. The process_item will make a database query to check if the current item’s title already exists. If it does, the whole item will be dropped, as can be seen below with the warning information indication:

Updating the Spider script
Just as was done with the CSV Pipeline Spider, we need to configure the spider to use the Item Pipelines that we created for the database storage.
class ArticleSpider(Spider):
    name = "spider_sqlitepipe"
    start_urls = ['https://medium.com/hackernoon/archive']
    custom_settings = {
        # other custom settings omitted for simplicity
        'ITEM_PIPELINES': {
            'medium_scraper.pipelines.DefaultValuesPipeline': 100,
            'medium_scraper.pipelines.AvoidDuplicatesPipeline':300,
            'medium_scraper.pipelines.SQLiteWriterPipeline': 400,
            },
        }
I’ll still maintain the DefaultValuesPipelines because it is still useful, but I’ll replace the CsvWriterPipeline with the AvoidDuplicatesPipeline and the SQLiteWriterPipeline. There is no problem in maintaining the CsvWriterPipeline active though, data will be saved both in CSV and in a database file.
Running the Spider
Again, since there are pipelines dedicated for data storage, the command line to start web scraping with this spider is:
scrapy crawl spider_sqlitepipe
Conclusions
With Item Pipelines, we can extend the functionalities of our spider by setting, validating, dropping and saving the scraped data in databases, among other possibilities.
Combined with other built in functionalities, such as the ones explained in Part I and Part II, as well as others that are outside the scope of this project, Scrapy not only can be considered a major web scraping framework for Python, but it can also be used to extract data using APIs or as a general-purpose web crawler.
Once the learning curve is surpassed, reusing code, maintaining and scaling projects becomes natural. I hope that this series of articles helps in tackling the learning curve, by starting with a simple single scripted spider to a more feature-rich spider with customized functionalities.
You can check the complete code here.
And if you have any questions or suggestions, feel free to contact me.
References and more resources
The first part of this series of articles
The second part of this series of articles
A Minimalist End-to-End Scrapy Tutorial (Part III) - An amazing series of articles about Scrapy project end-to-end.
Scrapy Tutorial Series: Web Scraping Using Python - Another series of articles about Scrapy, that also involves Item, Item Loaders, Item Pipelines and SQLAlchemy.
What is a Database Schema? - Additional information about database schema.
Item Pipeline - Official Scrapy documentation about Item Pipeline
Item Exporter - Official Scrapy documentation about Item Exporters
Feed Exports - Official Scrapy documentation about Feed Exports

